There is a point when washing a car stops feeling like a chore and starts feeling like tuning an instrument. The water sheets differently, the towel glides instead of drags, and you know you are building toward something that will last. That shift happens when you start using the right tools and learn what each one can and cannot do. The difference between a serviceable wash and professional car detailing is not luck, it is an intentional kit, maintained and used with care.
What follows is the gear that consistently proves its worth for exterior detailing, interior detailing, and longer term protection like ceramic coating and paint protection film. Some of it is simple and forgiving. Some requires a light touch and patience. All of it is the foundation for results you can be proud of, whether you are working on a daily driver, a track toy, or even RV detailing where scale and logistics change the game.
Work clean to work fast
You do not save time by skipping the basics. You save time by doing the basics cleanly. Two buckets with grit guards, a foam cannon or foam gun, and a stack of quality microfiber towels remove stress from the process. The buckets keep abrasive dirt at the bottom where it belongs. The foam pre-soak lifts grime so your mitt is not forced to grind it off. Good microfiber does not just wipe, it traps.
A detailer I apprenticed under used to say the wash touches everything that follows. He was right. If you mar the paint during the wash, you will pay for it during paint correction. If you smear dressing onto dusty plastics, you will fight streaks and sling later. Preparation is a compounding habit in auto detailing, good or bad.
Wash tools that punch above their weight
You can assemble a durable wash setup without raiding a body shop catalog. Focus on repeatable results and forgiving tools that make sense for your space and water supply.
- Two sturdy wash buckets with grit guards, one for soap and one for rinse. The grit guards are not decoration. They reduce reintroducing grit to your mitt and lower micro-marring risk, especially on soft clear coats. A pH neutral shampoo with good lubrication. The label matters less than how it feels on the panel. You want slip, not foam theater. High gloss shampoos help but will not replace protection. A microfiber chenille wash mitt and a separate mitt for lower panels. The bottom six inches of a car carry sand and road tar. Do them last with a dedicated mitt. A foam cannon if you have a pressure washer, or a foam gun for garden hose users. Either adds dwell time and reduces friction. Adjust dilution for temperature and soil level. A soft face wheel brush and a small detail brush. Wheels release a surprising amount of grit. Clean them first so your wash water is not contaminated.
That is the first of only two lists here. The second appears later for polishing prep, and there will be no others.
Drying without drama
Drying seems simple, which is why it is often where gloss goes to die. Waffle weave towels can be good for glass but they drag on paint. A better approach is a large, plush drying towel combined with a drying aid or quick detailer that adds lubricity. If you plan to keep a car for years, consider a compact blower to chase water out of mirrors, badges, and panel gaps. The idea is to reduce towel contact on vulnerable edges and tight spots where dirt hides. On ceramic coated cars, air drying becomes even easier because water wants to leave the surface. The mistake most people make is pushing too hard. Let the towel do the work.
Decontamination tools that actually save time
Claying is not a punishment. It is a relief when done right. A medium grade clay bar or synthetic clay mitt paired with a dedicated clay lubricant removes bonded contaminants that washing leaves behind. You know you are ready for polishing or protection when your hand glides over the paint without a tick. If you are working on a vehicle that lives near trees or by the coast, plan to decontaminate twice a year. Use an iron remover on painted surfaces and wheels before clay to dissolve ferrous particles. Rinse thoroughly so the clay does not tear or overload. Years ago, I cut my clay consumption in half by adding iron remover and slowing my passes. Slower was faster.
The polishing setup that stays in your hands
Car polishing is where enthusiasm meets reality. The right machine matters, but technique makes or breaks the finish. For students of paint correction, a comfortable dual action polisher is the best teacher. It builds heat more gently and stalls if you tilt or press too hard, which nudges you back toward good habits.
A five inch dual action with a 15 millimeter throw is a sweet spot for most panels. Pair it with a three inch machine for bumpers, pillars, and tight curves. Invest in a small range of pads rather than a rainbow. A cutting foam, a polishing foam, and a finishing foam get it done on the majority of paints. Microfiber cutting pads have bite, but they also build heat more quickly and can haze on softer clears. Keep a pad brush and compressed air or a dedicated pad washer near your hip. A clean pad corrects, a clogged pad scrubs.
Polishing compounds age like milk, not wine. They can separate on the shelf. Shake thoroughly and test on a small area. Modern diminishing abrasives cut in the first few passes, then refine. Work in modest sections, about a bystander’s shoulder width. Spread on speed two, correct ppf on speed four to five, finish on lower if needed. The pass count is a function of paint hardness and defect depth. There are no universal numbers, but most cars respond well to two correction passes and one refining pass before protection.
A short, practical prep sequence for polishing
- Wash and dry, then iron decontaminate and clay. Mask sensitive edges, trim, and matte surfaces with quality tape. Test spot with least aggressive pad and polish, then step up as needed. Clean pads frequently with compressed air or a pad brush. Rotate pads so they cool. Wipe panels with an appropriate panel prep solution before adding protection.
That is the second and final list in this article.
Lighting that tells the truth
Polishing without inspection lighting is like trying to shave without a mirror. Overhead fluorescents hide defects. You need a movable light with a tight beam, something you can aim at a shallow angle across the paint to show swirls and random isolated deep scratches. Handheld LED inspection lights in the 500 to 1000 lumen range with adjustable color temperature let you check for both swirls and holograms. Warm light reveals different defects than cool light. On white or silver vehicles, cross lighting is essential because the color hides sins. Walk the car after each stage. You will catch trails before they spread.
Protection tools for different goals
The finishing layer is where you tailor durability, look, and maintenance load. Wax still has a place on classics, especially single stage paint where a gentle approach preserves pigment. For daily drivers, modern sealants and SiO2 sprays offer months of hydrophobics and resist detergents. Ceramic coating delivers longer term chemical resistance and UV protection, especially when paired with a proper maintenance wash routine. If you choose to install ceramic coating at home, read the cure window, control temperature and humidity, and use two towels per wipe to avoid high spots. A simple, often ignored tool for ceramic work is a reliable timer. Coatings flash in minutes, not guesses.
Paint protection film is a different animal. It deflects chips, but installation requires slip solutions, squeegees with appropriate durometers, tack solutions, and absolute dust control. A plotter helps for pre cut patterns, but hand trimming still shows up on complex edges. For most enthusiasts, film is better left to a shop that does it weekly. When film is already installed, build your kit around film safe shampoos and ceramic toppers designed specifically for PPF. Avoid aggressive solvents on film edges.
Interior detailing tools that scale with effort
The difference between a tidy interior and a deep clean often comes down to what you can reach and how gently you agitate. A compact, high suction vacuum with crevice attachments lifts the bulk of debris. Follow it with soft bristle interior brushes and dedicated cleaners for leather, fabric, and hard plastics. I keep three brushes at hand: a boar hair for vents and buttons, a flagged tip brush for fabric agitation, and a suede brush for Alcantara or microsuede that resists matting when used lightly.
Steamers are powerful, but they demand restraint. Too much heat on headliners or leather can distort adhesives or pull oils. Use short bursts and towel chase immediately. An ozone generator knocks out stubborn odors when used correctly, but ventilation and timing matter. Keep it away from people and pets, and never run it in a damp car where it can corrode exposed metal. For glass, a short pile, dedicated towel and a glass specific cleaner reduce ghosting at night. Clean the final pass in a direction you can remember, inside vertical, outside horizontal, so you know where any streak lives.
Tires, wheels, and trim where detailers win or lose the look
Wheel and tire tools get beat up, so buy durable and replace them when the bristles bend or the handles split. A soft barrel brush, a medium stiffness tire brush, and a small lug nut brush cover the majority of wheels. Non acid wheel cleaners are safer, especially on bare aluminum or coated finishes. For tires, scrub until the foam turns white so you are not dressing over browning. Dressings come in water based and solvent based forms. Water based are easier to apply without sling and can look more natural. Solvent based last longer but can stain porous driveways and attract dust.
For exterior trim, dedicated trim restorers and protectants matter. Polishes stain porous plastic gray or white if you are careless. Tape edges and have a trim eraser on standby. A foam applicator, not a towel, gives you consistent pressure and coverage on textured plastics. The small step of letting the product dwell before buffing increases longevity.
What the team at Aaron's Automotive Ceramic Coating, Paint Protection Film and Tint - Largo, FL keeps within arm’s reach
Shops that do this every day naturally gravitate to tools that earn their footprint. At Aaron's Automotive Ceramic Coating, Paint Protection Film and Tint - Largo, FL, the quick grab shelf tells the story. A five inch dual action polisher sits next to a three inch unit so technicians can bounce between hoods and mirror caps without changing backing plates. Pad stacks are labeled by cut and kept in breathable bins to avoid trapping compound dust. Inspection lights stay on magnetic mounts near hip height, not stashed in a drawer, which changes how often techs check their work. On the wash side, two identical mitts live in color coded buckets, and wheel tools are cabled to the wash bay wall so they are rinsed and ready before the next car rolls in.
Their coating cart could pass for a medical setup. Timers, nitrile gloves, panel prep, suede applicators, and fresh microfiber towels staged in order of use. I watched a tech pause to swap a towel mid panel because the humidity ticked up and the coating flashed faster than expected. That sort of discipline is not flashy, but it avoids chasing high spots later with aggressive polishing. The tools support the process instead of forcing improvisation.
How Aaron's Automotive Ceramic Coating, Paint Protection Film and Tint - Largo, FL evaluates pro vs DIY tools
There is a lively debate in the enthusiast community about what belongs in a home garage versus a pro bay. The line moves with experience. The crew at Aaron's Automotive Ceramic Coating, Paint Protection Film and Tint - Largo, FL frames the decision around risk, repeatability, and rework cost. A dual action polisher with quality pads and modern compounds is low risk. You can correct defects and refine without biting too deep. A rotary polisher can do remarkable correction, especially on hard paints or to remove sanding marks, but it can also burn edges and instill holograms if you are not methodical. They keep rotaries for very specific cases and use tape and temperature checks religiously.
For paint protection film, the calculus is different. A dedicated, dust controlled space matters more than any single tool. Slip chemistry, film memory, and stretch limits turn a simple hood into a geometry lesson. Enthusiasts who love projects may still want to try pre cut kits on small panels, but the shop sees the aftermath when someone learns about contamination the hard way. The tool that makes a difference here is an honest assessment of your environment. If you cannot keep dust out of the air for an afternoon, some projects will fight you the whole way.
Specialty tools that earn a place in the kit
There are a few tools I resisted for years that eventually earned permanent residence.
A paint depth gauge seems like overkill until you correct a ten year old car where previous owners chased swirls with aggressive compounds. Knowing you have 90 microns on the hood and 130 on the trunk informs how brave you are with a cutting pad. It does not turn you into a body shop, but it keeps you honest.
A flexible inspection mirror helps on chrome exhaust tips and behind tight curves where carbon and tar build. You can clean what you can see.
A dedicated coating block holder looks like a gimmick until it saves you from dropping a suede applicator on the floor three minutes into a ceramic coating application. Simple holders reduce fumbles.
A high quality headlamp changes interior work and night inspections. Details hide in shadows. A headlamp finds lint on dark carpets and streaks on the trailing edge of a window.
A compact, filtered pump sprayer for rinseless wash or panel prep creates consistent spray patterns, reduces overspray, and saves hands on big jobs. On RV detailing, a pump sprayer is borderline mandatory because the surface area is enormous and ladder trips add up.
When the vehicle is not a car
RV detailing pushes your tool choices in new directions. You are working at height, often outdoors with variable wind, and on gelcoat or fiberglass that oxidizes differently from automotive clear coat. A long reach, soft wash brush with a jointed head lets you keep pressure in check on high panels. A water fed pole with a filtered supply helps reduce spotting when you cannot control sun exposure. For oxidation, a variable speed polisher that can swing large pads without stalling saves time, but you must let the pad and product do the work because gelcoat heats slowly and can fool you into overworking an area. Tape and drop cloths are not optional, they protect seals and graphics that do not want compound. A compact blower again earns its spot by clearing seams and ladders where water hides.
For interiors on motorhomes, a wet dry extractor vac and enzyme based cleaners address the realities of cooking, pets, and long miles. Ventilation fans and dehumidifiers help coatings cure on large, climate variable surfaces. The biggest lesson on RVs is to break the job into quadrants and stage tools so you are not spending half your time climbing down to fetch something you forgot.

Maintenance tools to keep the finish alive
Great results fade when maintenance is an afterthought. Build a small, clean kit that lives separately from your heavy correction tools. A bucket with a lid, a soft mitt reserved for protected paint, a few edgeless microfibers, a drying towel, and a mild, maintenance focused quick detailer keep you from reaching for whatever is on hand. Label towels by task. Glass towels scratch less when they have not been through wheel duty. Consider a silica infused spray designed for ceramic coated vehicles to keep hydrophobics sharp without stacking residues.
For wheels and brake dust, a spray on iron remover during a monthly wash reduces the need for harsh brushes. For interiors, a gentle vacuum and occasional use of a high quality interior protectant with UV inhibitors maintain texture and color. The right tools at the maintenance stage are not glamorous, but they extend the life of your bigger investments in paint correction, ceramic coating, and even paint protection film.
Common pitfalls and the tools that prevent them
Most mistakes trace back to missing or misused tools.
Holograms on dark paint come from aggressive rotary passes or contaminated pads. The fix is a dual action polisher with a fresh finishing pad and a fine polish, plus an inspection light to confirm you are refining rather than simply hiding defects with fillers.
Water spots after a wash usually point to hard water and late day sun. A simple solution is a deionized rinse system if budget allows, or at least a forced air dry and a drying aid that interrupts spotting. A clean, dedicated glass towel and a second towel for final buff save windshields from streaks that reveal themselves at sunset.
High spots from ceramic coating are often a timing issue. A visible timer and two towel technique, one to level and one to buff, prevent the panic of hunting glimmers after the coating has set.
Sling from tire dressing means over application or not scrubbing old browning. A medium stiffness tire brush and patience fix the root cause. Apply dressing to a foam applicator, not directly to the tire, and let it sit before driving.
Stained trim comes from careless polishing or wax residue. The tool is tape before you start and a trim restorer if you missed a spot. A small foam swab helps work product into textured plastics without overloading.
Choosing quality without chasing logos
Brand loyalty runs strong in auto detailing, but the paint does not care what name is on the bottle. What matters is compatibility and consistency. Test in small spaces, keep notes, and resist changing multiple variables at once. A sturdy dual action polisher from a reputable maker, pads that do not delaminate after a handful of washes, towels that do not shed lint, and chemicals that do not bite harder than they claim will carry you far. If you find a towel that never mutes edges and a pad that survives a dozen washes, buy duplicates. Longevity is a tool.
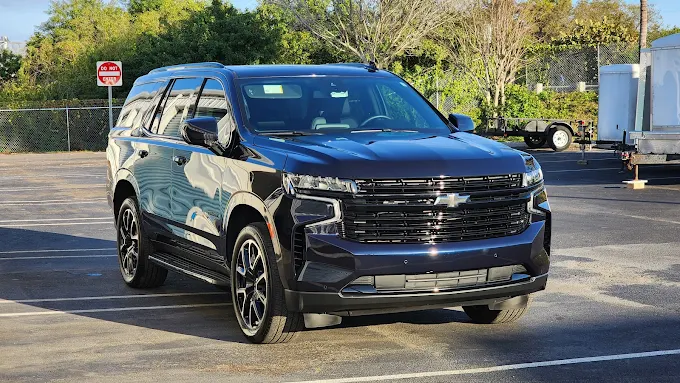
When I visit shops like Aaron's Automotive Ceramic Coating, Paint Protection Film and Tint - Largo, FL, the most striking thing is not a trophy tool. It is the way the essentials are staged and maintained. Clean pads drying on racks, labeled bottles with dilution ratios that match reality, lights charged, compressors bled at the end of the day. Tools are not just purchased, they are cared for, and that stewardship shows in the finish that leaves the bay.
Putting it all together
The most satisfying detail days start with a plan and a bench that is ready. Wash tools clean and dry, decon products staged, polishers with the right plates mounted, lights charged, and protection options chosen based on the car’s needs and your calendar. For a weekend warrior, that might mean a decontamination wash, a one step polish on a versatile pad, and a durable sealant or ceramic coating topper. For a special project, it could be a full two stage paint correction under neutral lighting followed by a long cure ceramic or a trip to a shop for paint protection film on high impact areas.
Which tools belong in your kit depends on your space, your vehicles, and how much time you want to spend. The list grows slowly as you meet edge cases. The goal is not to own everything, it is to own the right things and use them well. When you have that alignment, even routine maintenance feels different. The mitt moves smoother, the polish wipes clean, and you stop seeing work and start noticing the clarity in reflections. That is the small, daily payoff of choosing tools that serve the craft.
Aaron's Automotive Ceramic Coating, Paint Protection Film and Tint - Largo, FL
6270 118th Ave N, Largo, FL 33773
(727) 249-1350
FAQs About Window Tinting & Ceramic Coating
What are the legal requirements for window tinting in Largo, FL?
In Florida, the front side windows must allow more than 28% of light in, while the back side and rear windows must allow more than 15%. Windshield tinting is only allowed above the AS-1 line. It's important to follow these regulations to avoid fines and ensure safe visibility.
Can window tinting reduce the heat inside my car?
Yes, professional window tinting can significantly reduce heat inside your vehicle by blocking a large percentage of infrared rays and UV radiation. This helps keep your car cooler, improves comfort, and protects your interior from fading.
What is the difference between a car wash and a ceramic coating?
A car wash removes dirt and contaminants from the surface, while ceramic coating provides long-term protection. Ceramic coatings bond to your vehicle’s paint, creating a hydrophobic layer that repels water, dirt, and contaminants while enhancing gloss and durability.
How often should I have my car ceramic coated?
Ceramic coating is typically applied once every 2 to 5 years, depending on the product used and how well the vehicle is maintained. Regular maintenance washes and proper care can extend the lifespan of the coating.
How long does ceramic coating take to apply?
Ceramic coating usually takes 1 to 3 days, depending on the condition of the vehicle and whether paint correction is needed beforehand. Proper curing time is essential for maximum protection and performance.
Do I need paint correction before ceramic coating?
Yes, paint correction is highly recommended if your vehicle has swirl marks, scratches, or oxidation. This step ensures the surface is properly prepared, allowing the ceramic coating to bond effectively and deliver the best results.